Hi loves,
Hope you all are doing great. This week i will be doing a celebrity inspired look of priyanka chopra, which was on the cover of Vogue India released in dec 2011. I know that is a late issue but i loved the look and i couldn't resist recreating it.
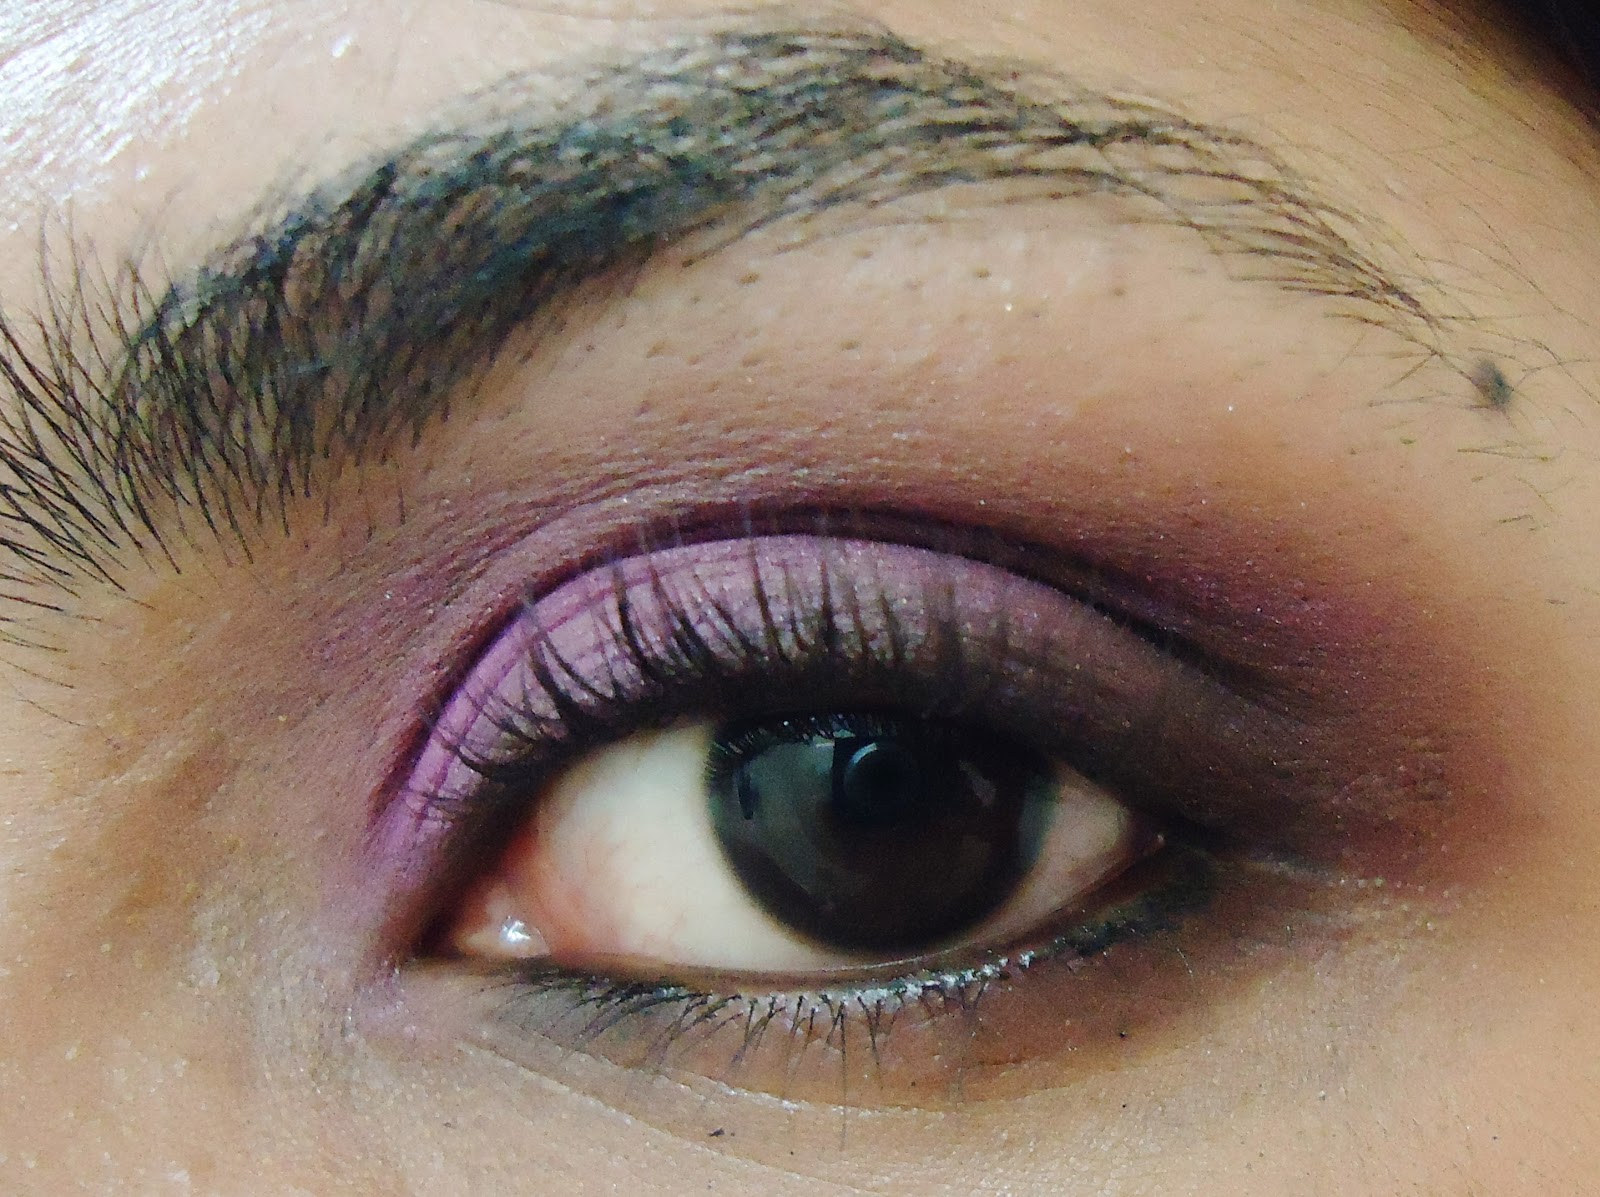
I love priyanka to bits, she is an amazing actress and has a wonderful personality. Her looks are always neutral, and almost looks as though she isn't wearing make up. But on the cover of vogue she is wearing a dark black and brown with a rosy nude lip.
She looks amazing and i hope i could do this look justice. Hope you enjoy..


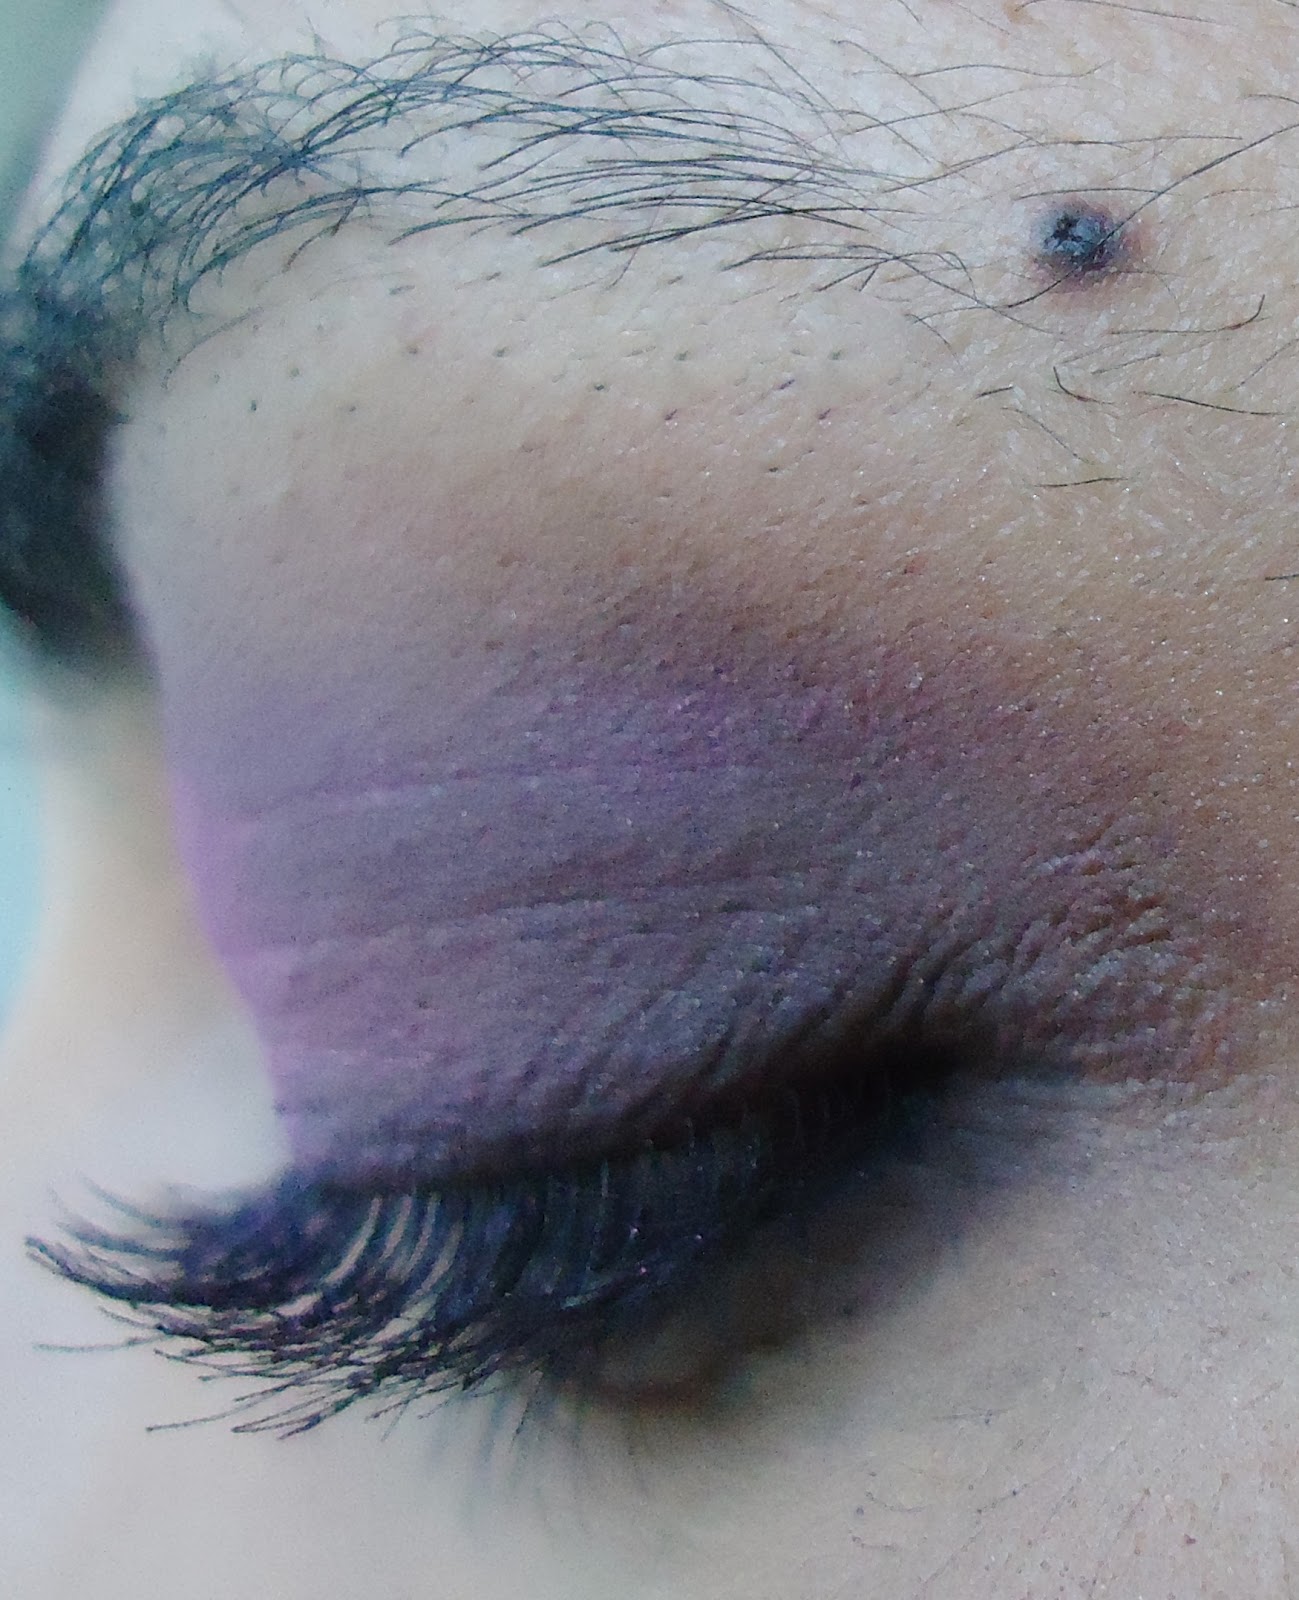
1. Prime your lids to prevent creasing.
 2. Take avon super shock pencil in chocolate melt all over your lids, this would help the matte eye-shadow stick better.
3. Then taking a flat shader brush take the colours marked with a yellow circle and red circle and apply it on top of chocolate melt, and bring it slightly into your crease. Make sure to blend to avoid a harsh line.
4. Then take blending brush and pick up the colour marked with a white circle and blend it in circular motions into the outer v and bring it into your crease. Make sure to blend to avoid a harsh line.
5. keep adding colour to make the outer v deep and dark.
6. Add a highlighter colour which is marked with the blue circle on to your brow bone.
7. Then take some Vaseline and add it on to the middle of your lids for shine.
8. Line the inner & upper lash line with a black pencil liner.
9. Then i used the colour marked with the yellow circle as a bronzer.

10. Then for my lip colour i first applied Maybelline Colour Sensational Lipsticks in hooked on pink and then on top i added born with it.
11. Curl your lashes and apply black mascara to top and bottom lashes.
12. Apply your other make-up as usual.


Hope you all are doing great. This week i will be doing a celebrity inspired look of priyanka chopra, which was on the cover of Vogue India released in dec 2011. I know that is a late issue but i loved the look and i couldn't resist recreating it.
I love priyanka to bits, she is an amazing actress and has a wonderful personality. Her looks are always neutral, and almost looks as though she isn't wearing make up. But on the cover of vogue she is wearing a dark black and brown with a rosy nude lip.
She looks amazing and i hope i could do this look justice. Hope you enjoy..

Image from bollyupdates

Image from jolieasie


1. Prime your lids to prevent creasing.

3. Then taking a flat shader brush take the colours marked with a yellow circle and red circle and apply it on top of chocolate melt, and bring it slightly into your crease. Make sure to blend to avoid a harsh line.
4. Then take blending brush and pick up the colour marked with a white circle and blend it in circular motions into the outer v and bring it into your crease. Make sure to blend to avoid a harsh line.
5. keep adding colour to make the outer v deep and dark.
6. Add a highlighter colour which is marked with the blue circle on to your brow bone.
7. Then take some Vaseline and add it on to the middle of your lids for shine.
8. Line the inner & upper lash line with a black pencil liner.
9. Then i used the colour marked with the yellow circle as a bronzer.

10. Then for my lip colour i first applied Maybelline Colour Sensational Lipsticks in hooked on pink and then on top i added born with it.
11. Curl your lashes and apply black mascara to top and bottom lashes.
12. Apply your other make-up as usual.


Face
1. Mac Studio Fix Fluid
2. Mac Mineralized Concealer
3. Mac Studio Fix Powder
Eyes
- 88 palette
Lips
- Maybeline Lipstick in Born With It & Hooked On Pink ( Review Here)
So what do you guys think of this weeks tutorial? Do you think i did the look justice. This was actually my first time using a bronzer and actually doing a celebrity look. Let me know in the comments below what you think.. If you liked this post why not share it with the links below...
Until Next Time..
XoXo
Antique-Purple


.jpg)
.jpg)
.jpg)


